Have you finally got your FYTA Beam and want to get started with FYTA?
Here you will find the parts list and an overview of the first steps.
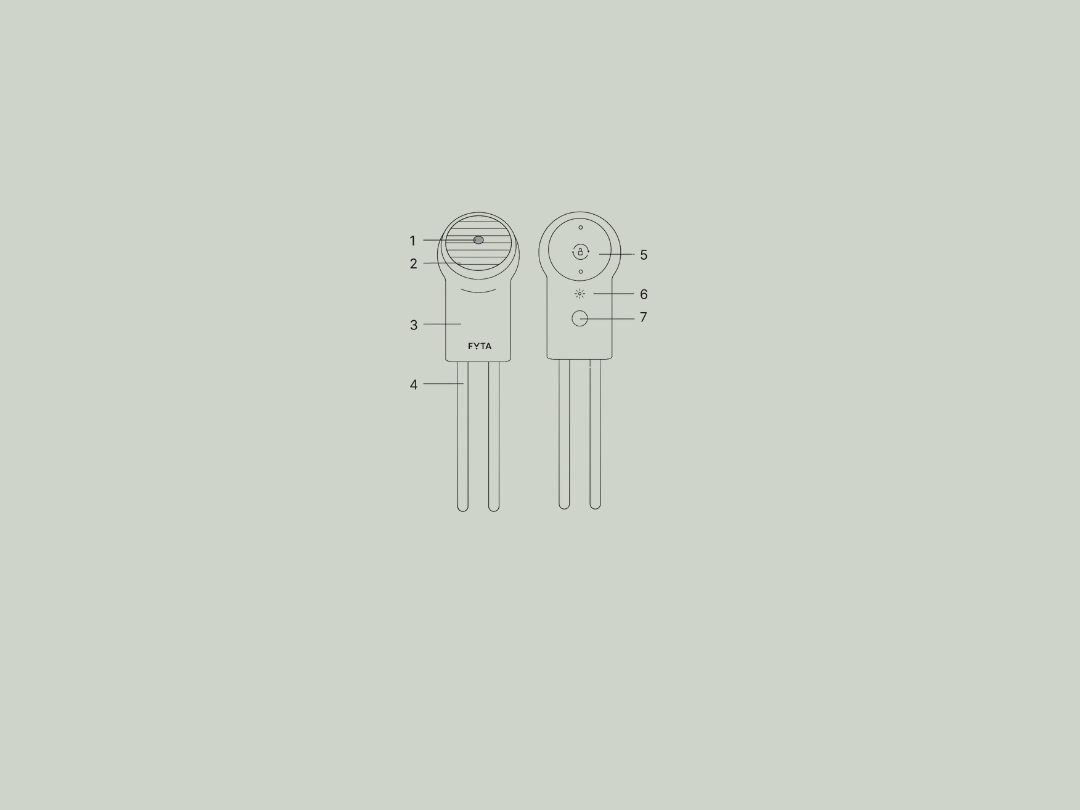
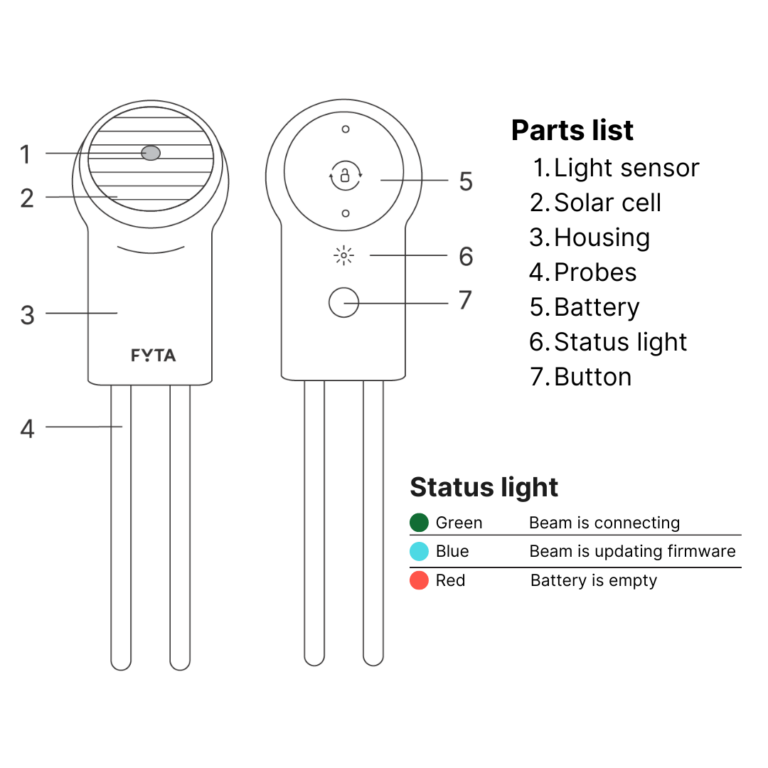
Overview of the FYTA Beam
First steps with FYTA
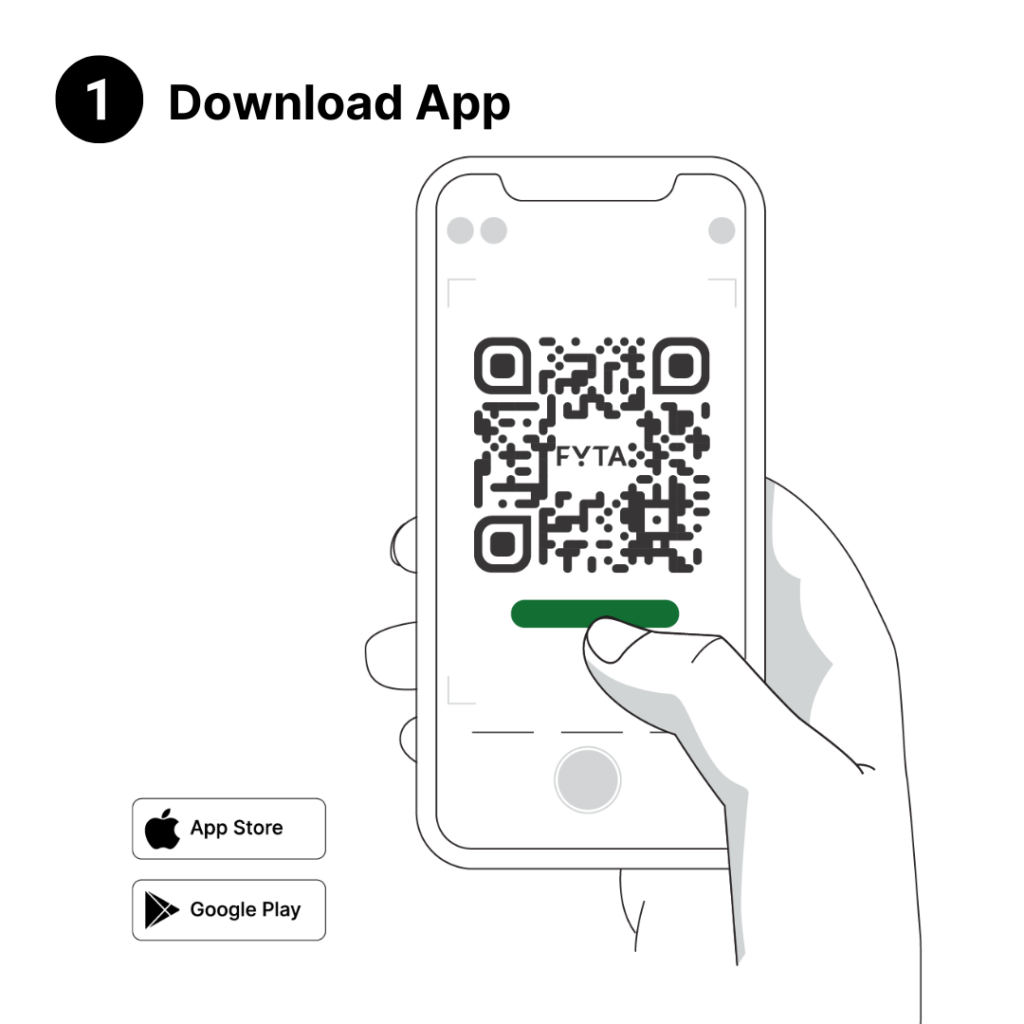
First download the FYTA app and create an account.
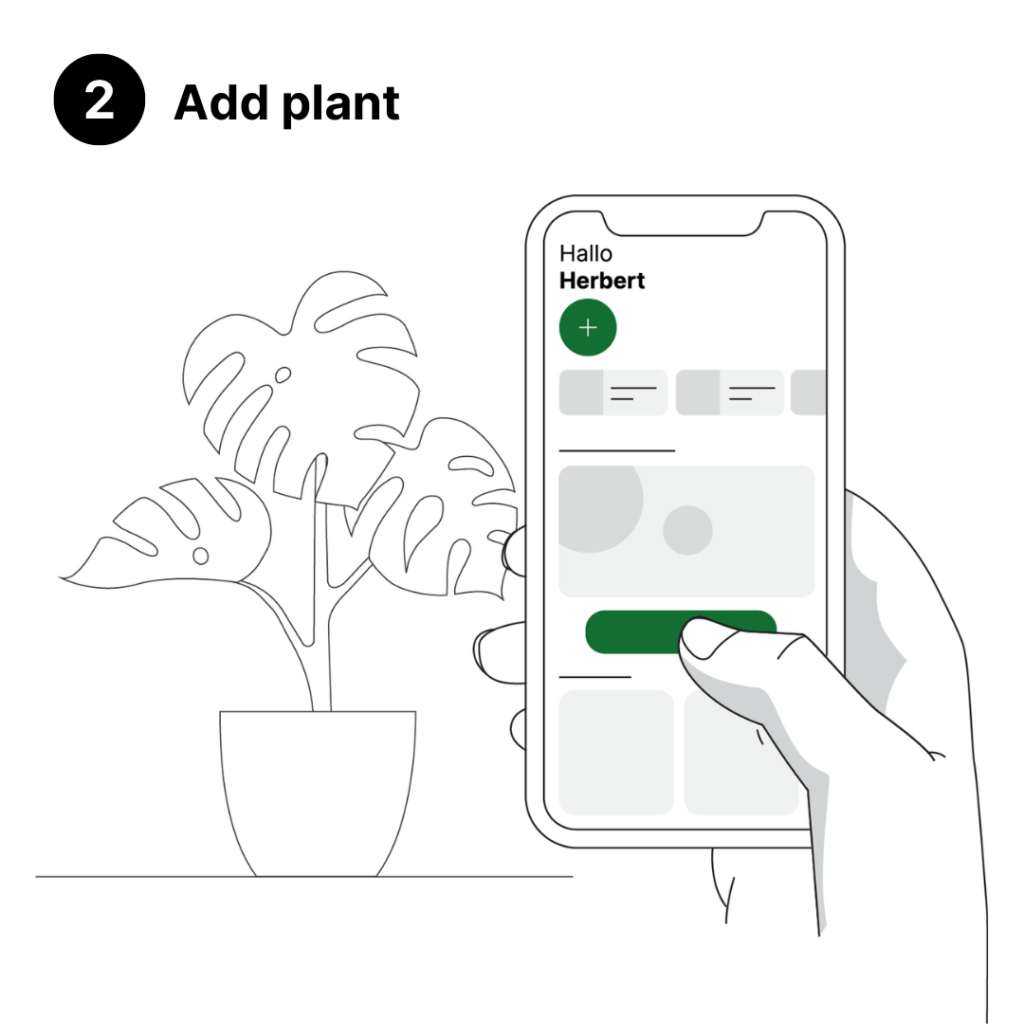
Once you have taken a tour in the app, you are now ready to add your first plant. On the home screen, you will be asked to identify your first plant with a photo. The app will then guide you through the next steps.
Alternative: If you know which plant you have, visit our plant library (book symbol) and enter its name in the search bar. Found it? Use the plus to add it and you can then assign it to a garden you have created yourself.
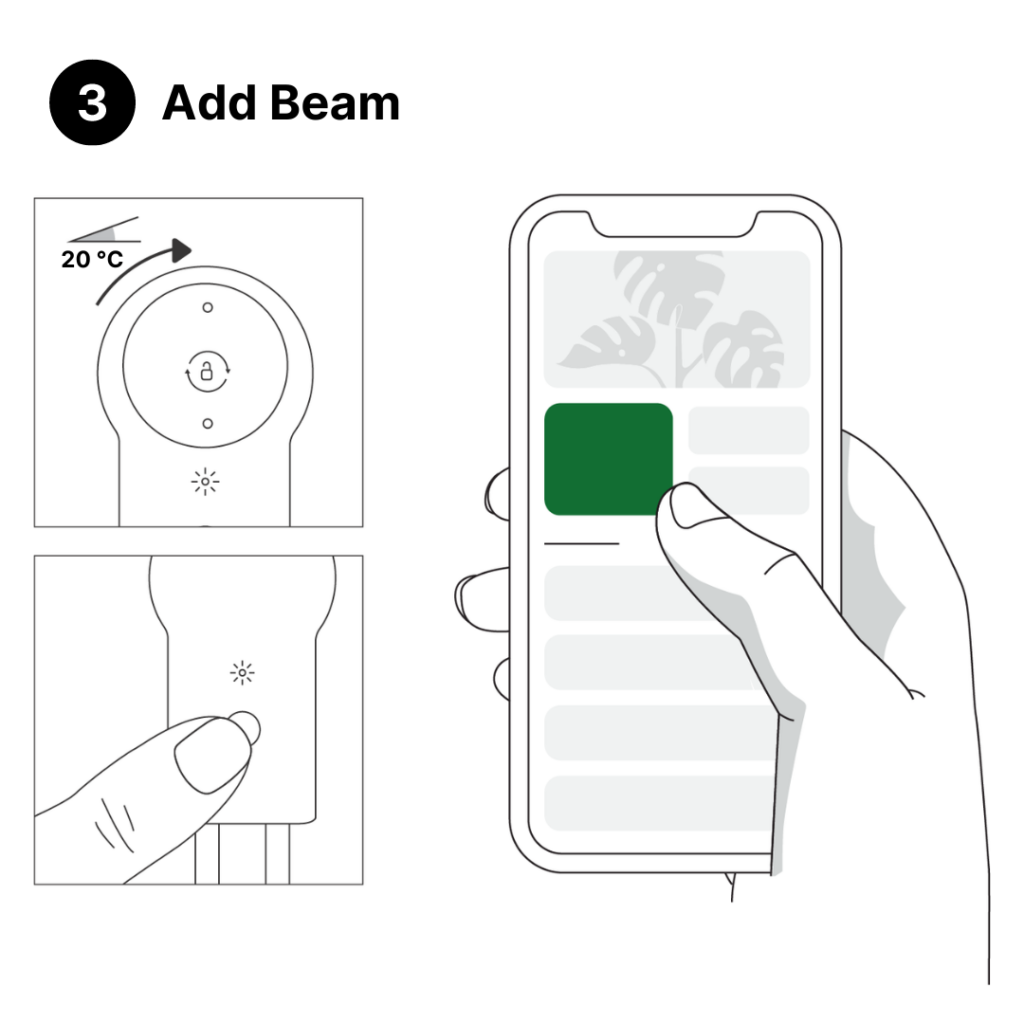
Next, connect your FYTA Beam to your plant. To do this, remove the foil from the battery compartment, reinsert the battery, close the lid and press the button on the back of the Beam. Now visit the profile of your plant. Tap on the upper, large tile with the Beam symbol and add your FYTA Beam. The app will guide you through the next steps.
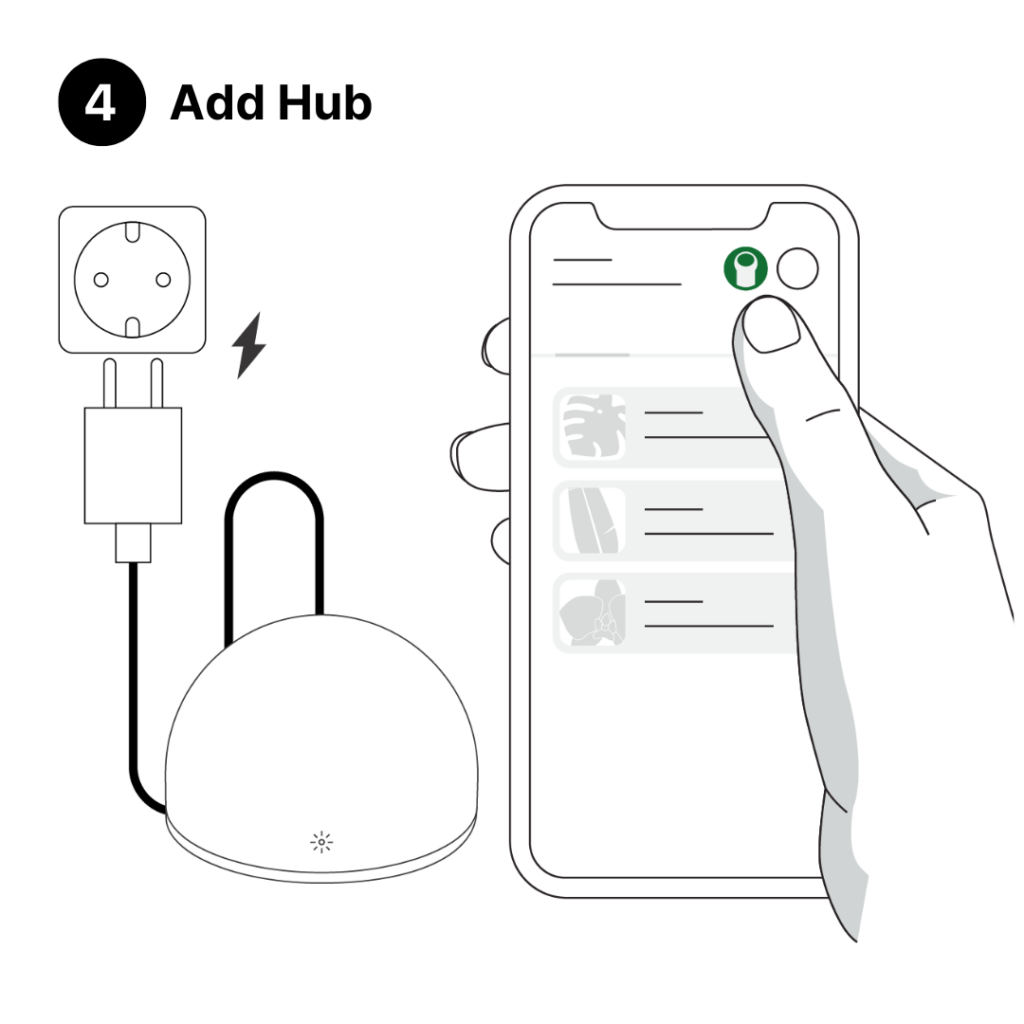
If you also have a WiFi hub, add this too. You can do this in the ‘My plants’ screen.
If you get stuck, please contact us in the Help Center. You can reach us via the dark green dot at the bottom of the screen under ‘Help’. Our plant and technical experts will do everything they can to help you get off to a smooth start.